The Music of the Night Dress
Hello! A busy and rainy week delayed me in finishing this dress, but it finally happened and I'm very happy with it! This is my Music of the Night Dress, which was made using the fantastic Lonsdale Dress from Sewaholic Patterns. I've loved all of Tasia's versions, and knew I wanted to make it when she first sent out the announcement in her e-newsletter. She loves fitted bodices and full skirts (like me!); I can't wait to see her future designs.

...The Basics...


...The Basics...
- Pattern: Lonsdale Dress from Sewaholic Patterns (2011)
- Fabric: 3.5 yards of thrifted black and beige poly/silk (?); cotton underlining for the skirt
- Notions: stay tape at the front bodice neckline; fusible woven interfacing at the waistband, black 16" zipper trimmed down to about 13"; black hem tape at inner hem.
- **Time in Stash: only a few months for both pattern and fabric!
**I'm trying to use as much of my fabric/pattern stash as possible these next few months; I've even set a personal goal to make at least 5 items before I'm allowed to purchase more (unless it's fabric for a project for another person, though I have to admit I'd like to keep those to an absolute minimum!).
I had no concept of buying fabric from thrift stores until I read Casey's Elegant Musings blog more and more - pretty fabric for a fraction of the price, how nifty! This black mystery fabric was one of my first thrift finds. It has a very nice drape and feel to it, and I'm thinking it's a poly/silk. The print looks a lot like Black Marquina Marble (architecture nerd moment!) and I like that it doesn't wrinkle.


...Construction Process...
After making a muslin of the bodice I went with a size 6 up top and transitioned to a size 0 for the skirt. The pattern is drafted for pear shapes so I had to go with a smaller hip size to "de-pear" the pattern. The 6 ended up being too loose in the bodice so I took in the side seams for a better fit (though I did keep the size 6 waistband). I chose to double-knot the ties at the front since it felt more secure that way. I like that you don't have to be too, too fastidious about the fitting of the neckline since you can just tighten it a bit by pulling the ties.
Because it's sheer, I underlined the skirt pieces with cotton I had from Joann's (I think underlining might be the coolest technique ever, so easy to hand stitch a blind hem). The fabric didn't like being pressed, so instead of understitching the bodice and pockets, as the pattern instructions suggest, I topstitched both and found the fabric behaved that way. I also did this for the ties since no amount of pressing could get them to stay flat! The bodice is self-lined and the exposed seam allowances in the skirt are serged.
 |
| I love the pockets and how they're put together! |
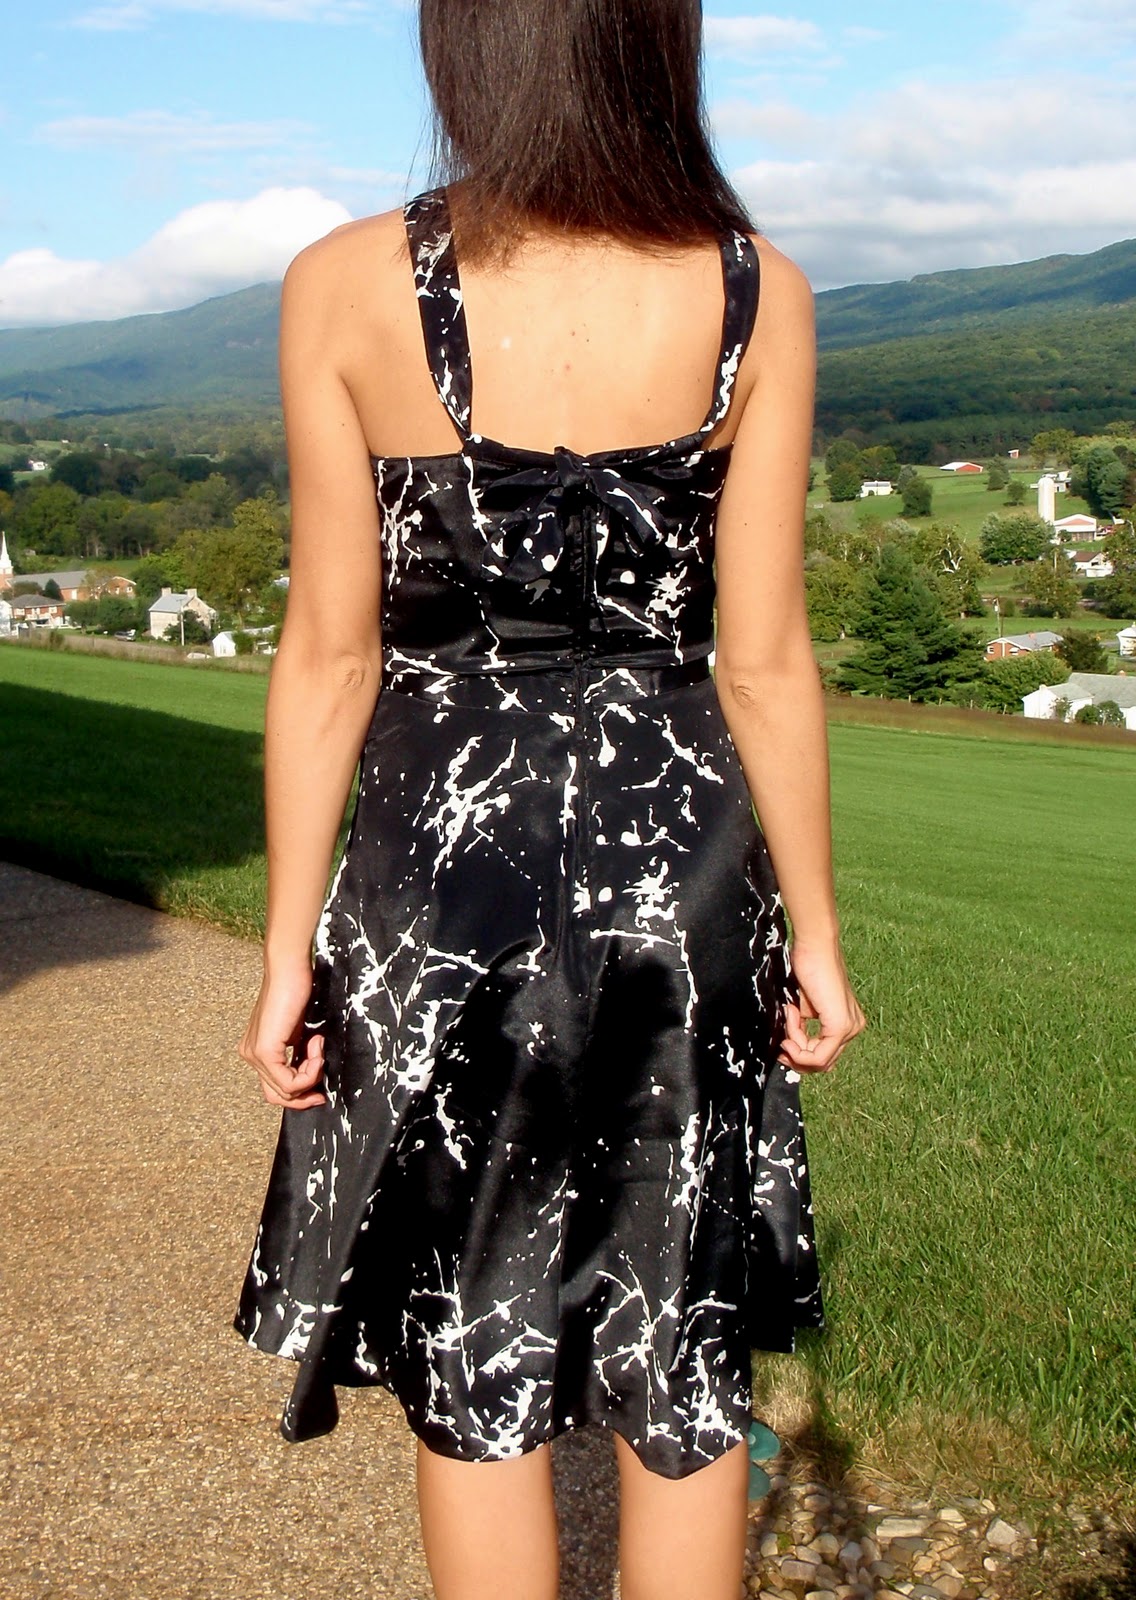 |
| The ties end in a hard-to-see bow (they look off-center because of the way I'm angled to the camera). |
...Coulda, Shoulda, Woulda...
I figured I'd add a section for things I need to remember or do for next time (I definitely plan on making more of these). Bullet points make for easy reference later on, I find!
- This is probably obvious, but FOLD the loops before basting them on to the back bodice pieces. I only basted in one side of each loop before I noticed my mistake, whoops!
- When sewing the waistband to the skirt, only machine stitch the outer waistband on the first go around and THEN slipstitch the seam allowance of the inner waistband. I didn't do this, but made it work anyway (though I'd like to do it properly the next time!).
- If underlining the skirt pieces, remember to underline the pocket pieces since they also form part of the skirt.
- Make sure bodice side and center seams line up with skirt seams. Because the waistband has no seams and it separates the bodice and skirt I forgot to be extra careful about matching. Not such a big deal with the black fabric I used but good to keep in mind.
- Perhaps I should have underlined the bodice since the fabric is so lightweight? I think it works fine as it is, but after I saw Sarai's post about how she underlined hers for more structure it got me thinking (especially since the fabric is only held up by the center front ties).
- Shorten the bodice about 1/2" or so in the next version so the waistband hits at the natural waist. It's fine here, but that would be a nice tweak for next time.
It's a very fun dress to wear (yay for twirling!) and I already plan to wear it next week on vacation for a special dinner. I started with this fabric because it was inexpensive and if I made an error it wouldn't have been costly. But then as I was working on the dress I loved the fabric more and more and was hoping all would go well, and it did, phew! Some errors as far as fit, but I'm finally getting good about following my grandmother's advice to baste major seams before committing to smaller stitches. So much easier to unpick stitches that way!
I've named this The Music of the Night Dress as a nod to the Broadway musical, The Phantom of the Opera, as you may have guessed. My family and I saw it tons of times when we lived up north and I've been listening to the soundtrack of late - the colors of this dress remind me of the phantom and the album cover, minus a red rose!

And I'll end this post with a shot of me and my pal, Mr. Darcy! He's the funniest cat I know, his pose and facial expression here crack me up. I think he was scheming a way out of my arms so he could wander around the garden. His black coat makes my dress look almost navy in color!
Happy end of September, everyone!


Comments
Post a Comment